 English
You've booked the venue, confirmed the speakers, and locked the catering. Then someone asks, "What are we using for the main screen?" If your answer is "a projector," you already know what happens next: washed-out slides, a shadow of a presenter walking across the image, and a room full of people squinting at something that looks like it belongs in a school hall. This is exactly why high technology rental indoor LED screen hire has become the default for conferences, product launches, trade shows, corporate galas, houses of worship, and broadcast studios. The question is no longer whether to use LED—it's how to choose the right spec, avoid being overcharged, and make sure the screen actually looks good on camera and in person.
This guide answers that. It covers pixel pitch, brightness, refresh rate, cabinet types, control systems, real pricing, hidden fees, and a step-by-step booking process you can follow today.
Let's answer the core question first, because vendors love to hide behind this phrase.
Q: Is "high technology rental indoor LED screen hire" just marketing language?
A: Partly—but there is a real technical threshold behind it. A genuinely high-spec indoor rental screen means: fine-pitch LEDs (P1.5–P2.9), die-cast aluminum or carbon-fiber cabinets, 3840Hz+ refresh rate, 14–16 bit gray scale, per-pixel calibration, dual power/signal backup, and a professional processor-driven control system. Anything below that is a standard event screen, which may be perfectly fine for a ballroom—but it won't survive a close-up camera shot or a 4K livestream.
The practical difference shows up in three places:
On camera. Low refresh rates create rolling scan lines and flicker in video. At 3840Hz and above, those disappear.
Up close. Fine pitch keeps text sharp when the front row is three meters away.
In color. Calibrated panels with high gray scale prevent banding in gradients—those awful stripes in a sky-blue background slide.
Pixel pitch is the distance between LED centers, measured in millimeters. Smaller number = more pixels per square meter = sharper image = higher cost. Get this wrong and nothing else fixes it.
Rule of thumb: minimum viewing distance (in meters) ≈ pixel pitch number × 1 to 1.5. For comfortable, detailed viewing, multiply by 2–3.
| Pixel pitch | Pixels per m² | Best viewing distance | Typical indoor use | Relative cost |
|---|---|---|---|---|
| P1.2–P1.5 | 444,000–694,000 | 1.5–4 m | Boardrooms, broadcast studios, luxury retail | Highest |
| P1.8–P1.9 | 277,000–308,000 | 2–5 m | Keynotes, auditoriums, hybrid studios | High |
| P2.5–P2.6 | 147,000–160,000 | 3–8 m | Conferences, banquets, churches, expos | Mid |
| P2.9–P3.9 | 65,000–118,000 | 5–12 m | Stages, backdrops, large ballrooms | Most economical |
| P4.8+ | 43,000 | 8 m+ | Very large venues, rear-of-house viewing | Lowest |
My take: most event planners overspend on pitch. If your audience sits 8 meters back, P2.6 and P3.9 look nearly identical from their seats—and the P2.6 will cost noticeably more. Spend the difference on more square meters instead. A bigger screen at P3.9 almost always delivers more impact than a smaller one at P2.6.
Exception: if the content includes fine text, data dashboards, product close-ups, or the screen will be filmed for a 4K stream, go one step finer than the distance chart suggests. Cameras magnify everything.
Indoor screens live in a very different light environment than outdoor ones. That's why an indoor rental unit typically runs 600–1,500 nits, while an outdoor wall needs 4,500–6,500 nits or more. Putting an outdoor-bright screen indoors doesn't make the image better—it makes it harsh, fatiguing, and harder to color-match on camera.
| Parameter | What it is | Target for indoor events | What goes wrong if it's low |
|---|---|---|---|
| Brightness | Light output in nits (cd/m²) | 600–1,500 nits; ≥1,200 for bright atriums or window-facing stages | Image looks dull or washed out by ambient light |
| Refresh rate | How often the image redraws | ≥1,920Hz minimum; 3,840Hz+ for any camera work | Flicker and scan lines in video/livestream |
| Gray scale | Color gradation steps | 14–16 bit | Banding in gradients, flat-looking visuals |
| Contrast ratio | Difference between brightest white and darkest black | 3,000:1 to 5,000:1 | Muddy blacks, low perceived depth |
| Viewing angle | Off-axis visibility | Horizontal ≥160° | Side seats see color shift and dimming |
| IP rating | Dust/moisture protection | IP20–IP43 indoors (IP54 if near fog machines or outdoors-adjacent) | Not usually critical indoors, but relevant for haze/fog effects |
One thing vendors rarely volunteer: brightness uniformity matters as much as peak brightness. Ask for ≥97% brightness uniformity and ≤±0.01 color uniformity. A screen with one bright patch and one dull patch looks cheap even if the spec sheet says 1,200 nits.
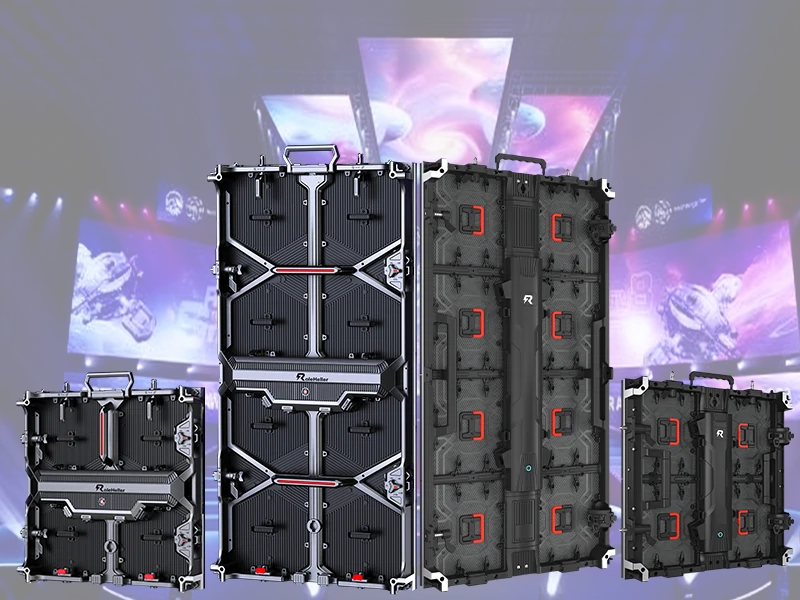
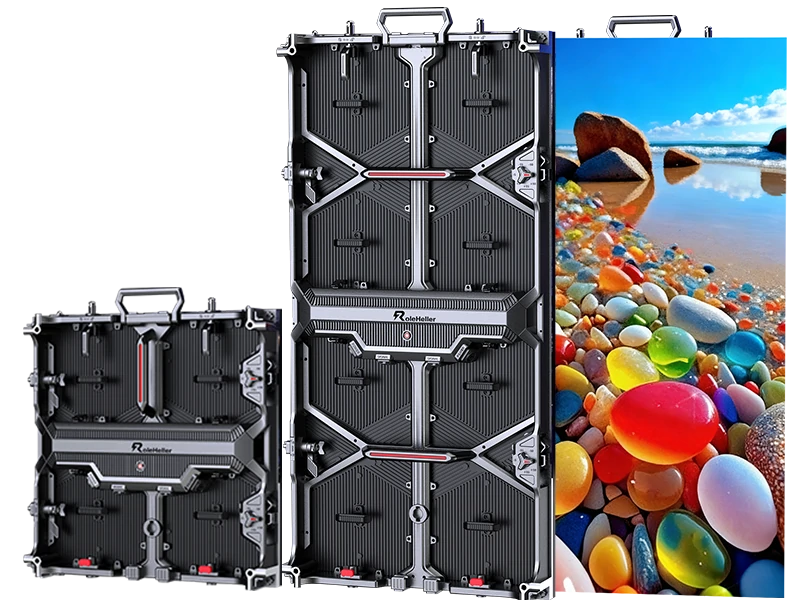
The cabinet is the physical building block—usually 500×500 mm or 500×1,000 mm panels that lock together. Two specs here directly affect your budget and your risk:
Weight. Modern die-cast aluminum cabinets run roughly 7–15 kg each; carbon-fiber options can be lighter still. A lighter cabinet means faster build, fewer crew members, lower rigging load, and cheaper freight. On a multi-day tour or a venue with strict loading dock windows, weight translates directly into money.
Flatness. Look for cabinet flatness of 0.1–0.2 mm. That's what gives you a seamless image with no visible seams or shadow lines between panels. Cheap cabinets drift out of alignment after a few builds, and suddenly your flawless backdrop has a grid of hairline gaps.
Other details worth checking:
Quick-lock mechanisms and tool-free maintenance — modules and power supplies should swap out in seconds, not minutes.
Front and rear service access — essential when the screen is built against a wall.
Dual power and dual signal backup — a single point of failure on a live stage is not a gamble worth taking.
Curved assembly capability — if you want arcs, columns, or wraps, confirm the cabinet supports angle locking.
You can rent the finest-pitch screen in the world and ruin it with a weak signal chain. The control system—processor, sending cards, receiving cards, and cabling—is what turns raw panels into a coherent picture.
Key requirements:
Professional-grade processor capable of handling your native canvas resolution without downscaling. If your screen is 8 m × 4.5 m at P2.6, that's a large pixel canvas—verify the processor can drive it.
Input compatibility with HDMI, SDI, and ideally 12G-SDI for broadcast. Confirm support for mainstream systems such as Novastar, Linsn, and Colorlight.
Frame sync and genlock if you're mixing multiple screens or feeding cameras. Without it, you'll get tearing and lip-sync drift.
Per-pixel calibration data loaded and verified on site. Calibration isn't a factory checkbox—it needs to be active in the current configuration.
Redundancy. Backup processor, backup signal path, spare modules, spare power supplies, spare cables. The best operators bring spares and expect to use them.
Q: Do we need an on-site technician?
A: Yes, absolutely. And not just for setup. You want an operator present through rehearsals and the live run. Content always changes last minute, aspect ratios never match the first draft, and someone will inevitably ask to plug in a laptop with an unusual resolution. The technician is your insurance policy.
Rental pricing varies by region, season, and scale, but these ranges reflect current market norms. Treat them as a sanity check against your quote.
| Screen size (approx.) | Pitch | Daily rental range (screen + basic install) | Notes |
|---|---|---|---|
| 3.5 × 2 m (~7 m²) | P2.6–P2.9 | $1,200–$2,500/day | Small stage backdrop, keynote |
| 5 × 3 m (~15 m²) | P2.6 | $2,500–$4,500/day | Mid-size conference, church |
| 6 × 3.5 m (~21 m²) | P3.9 | $3,000–$5,500/day | Ballroom, expo booth feature wall |
| 8 × 4.5 m (~36 m²) | P2.6–P3.9 | $6,000–$12,000/day | Main stage, product launch |
| Per m² add-ons | — | Curved/creative shapes +30–50%; floor tiles higher | Custom geometry costs more |
What's usually extra (and often buried in the fine print):
Video processor and scaling hardware
Freight, drayage, and venue cartage
Rigging, truss, ground support, or motorized hoists
Extended hours, overtime, union labor rules
Content creation and media server operation
Generator or dedicated power distribution
Insurance certificates and venue permits
Smart move: ask for an all-in quote broken into line items, and insist the vendor confirms in writing whether the price is all-inclusive. A quote that's 30% cheaper than the others isn't a bargain—it's usually missing the processor, freight, and labor.
Q: Is it cheaper to rent or buy?
A: If you're running the screen fewer than 10–15 days a year, rent. Once you pass that, ownership starts to make sense—but factor in storage, transport, calibration, technician salaries, firmware updates, and depreciation. Rental shifts all of that risk to the vendor. It also gives you access to newer technology every time, which matters in a category that improves noticeably year over year.
Follow this sequence. Doing the steps out of order is how you end up re-rigging the stage two days before doors open.
Step 1 — Define the canvas before you call anyone.
Measure the available width and height at the venue, including sightline obstructions. Decide the screen's role: primary focus (bigger), secondary IMAG (wider and higher), or scenic element (creative shape). Write down the dimensions in meters and the intended audience distance.
Step 2 — Choose pitch from viewing distance, not from ambition.
Use the table above. When in doubt between two pitches, pick the finer one only if the front row is within 4 meters or the event is being filmed.
Step 3 — Lock brightness to the room, not the catalog.
Dim, controlled lighting: 600–800 nits. Bright ballroom with ambient wash: 1,000–1,500 nits. Window-facing or atrium: push higher and request anti-glare treatment. Ask the venue for their house lighting plan and whether it's dimmable.
Step 4 — Confirm structural and power feasibility early.
Every square meter of LED draws real power and carries real weight. Ask the venue about floor or truss load limits, ceiling attachment points, and available amperage. A 20 m² wall can demand several kilowatts at peak. Never assume the venue can accommodate it.
Step 5 — Verify signal flow end to end.
Map it: content source → media server/laptop → switcher → processor → sending card → screen. Confirm cable runs, converter needs, and whether your presentation laptop's output matches the processor's input. Test with the actual show file, not a stock demo loop.
Step 6 — Build a content spec and hand it to your designer.
Design to the screen's native pixel resolution, not to 1920×1080 by habit. Supply safe margins for edges, avoid thin strobing patterns, and keep critical text away from the lowest row of cabinets. Provide a test pattern and a full-white/full-color check for on-site calibration verification.
Step 7 — Schedule rehearsal time and a full technical run.
The screen should be built, calibrated, and fed with real content at least one full day before the event. Run the entire show once, including transitions and video rolls. This is when problems reveal themselves—and when they're still fixable.
Choosing pitch by "which looks cooler." The right pitch is a function of distance and content. Nothing more.
Ignoring aspect ratio. A 16:9 video played on a 3:1 panoramic canvas gets letterboxed or stretched. Design content for the actual canvas.
Assuming "indoor" means any screen works. Haze, fog machines, confetti, and spilled drinks all challenge indoor-rated panels. If your production uses atmospheric effects, specify at least IP54.
Booking the screen but not the operator. Hardware without an experienced human is a liability.
Forgetting rigging and access. A beautiful screen that can't be flown because the roof points are insufficient is just expensive scenery sitting on the floor.
Underestimating power. Peak draw is much higher than average draw. Size your circuits for peak, and require dedicated breakers.
No spares, no backup path. Modules fail. Cables fail. Power supplies fail. The question is whether you discover that during soundcheck or during the CEO's keynote.
These separate established rental houses from brokers reselling gear they don't own.
Do you own this inventory, or is it subcontracted? Owned inventory means better availability, faster replacement, and direct accountability.
What's the exact pitch, cabinet size, and refresh rate of the units you're assigning? Vague answers are a red flag.
Can you provide a recent calibration report and uniformity figures? Reputable operators can.
What's included in the day rate, and what's billed separately? Demand a line-item breakdown.
How many spare modules, power supplies, and cables come on site?
Is a technician included for the full event duration, including rehearsals?
What's your response time if a panel fails mid-show?
Can I see photos or video of this exact setup at a comparable venue?
Do you carry liability insurance and can you provide a certificate matching our venue's requirements?
What's the cancellation and rescheduling policy?
Q: How far in advance should we book?
A: For standard sizes in off-peak periods, three to four weeks works. For large custom builds, trade-show seasons, and year-end corporate events, aim for eight to twelve weeks. Prime dates in peak season get reserved months ahead, and the good crews get booked first.
Not every screen needs to be a rectangle. Depending on your message and your budget, these formats can dramatically raise the impact:
Curved and arc walls — soften the image edge-to-edge and wrap the audience visually. Expect a premium of 30–50% over flat.
Transparent or mesh LED — ideal for retail windows, runway shows, and layered scenic design where you need depth and see-through areas.
Floor tiles / interactive LED — used for immersive stages and dance floors; requires load-rated panels and careful safety planning.
Columns and wraps — turn structural obstacles into branded assets.
XR and virtual production volumes — a different class entirely, requiring fine pitch, high refresh, camera tracking, and genlock. Only pursue this with a specialist team.
Personal view: creative shapes win awards, but they don't win audiences unless the content is designed for them from day one. An arc wall with a flat 16:9 video slapped onto it looks worse than a plain rectangle. Commit to the format early and brief your creative team accordingly.
A mediocre screen with great content beats a flagship screen with terrible content, every time. LED walls magnify design flaws—low-resolution logos, compressed video, mismatched color spaces. Invest in:
Native-resolution motion graphics, not upscaled PowerPoint exports.
High-bitrate video files with consistent color grading matched to the screen's calibration.
A content rehearsal where the designer watches the actual screen, not a laptop preview.
Lower thirds and IMAG framing planned around the screen's real dimensions.
And please, test your video files on the actual processor. Codec surprises are far more common than anyone admits.
1. What pixel pitch should I choose for an indoor conference with 200 attendees?
For a typical ballroom where the front row sits 4–6 meters back, P2.6 to P3.9 is the sweet spot. Go P2.6 if you're filming or showing detailed slides; P3.9 is fine for general stage backdrop use.
2. How bright does an indoor LED screen need to be?
Between 600 and 1,500 nits, depending on ambient light. Brighter isn't better indoors—it causes eye strain and makes camera exposure harder. Match brightness to the room.
3. What refresh rate do I need for livestreaming?
Minimum 1,920Hz, but 3,840Hz or higher is strongly recommended for any camera capture. Below that, you risk visible flicker and scan lines in recorded footage.
4. How much does it cost to rent an indoor LED screen per day?
Expect roughly $1,200 to $12,000+ per day depending on size and pitch, with small setups starting around $1,200–$2,500/day and large main-stage builds reaching $6,000–$12,000/day. Always confirm what's included.
5. How long does setup take?
A skilled crew can build and calibrate roughly 20–40 m² per day, depending on complexity, rigging, and access. Simple ground-supported walls are fastest; flown or curved structures take longer.
6. Can LED screens be curved or shaped?
Yes. Many rental cabinets support curved assembly with angle locking. Curved, cylindrical, and wrap configurations are common, though they carry a premium and require content designed specifically for the shape.
7. Do I need a technician on site?
Yes. Include an operator for setup, rehearsal, and the live event. They handle calibration, signal issues, last-minute content changes, and emergency swaps.
8. What's the difference between indoor and outdoor rental LED screens?
Indoor screens prioritize fine pitch, lower brightness (600–1,500 nits), and lighter cabinets. Outdoor screens prioritize high brightness (4,500–6,500+ nits), IP65 weatherproofing, and larger pixel pitches. Using an outdoor screen indoors produces a harsh, uncomfortable image.
9. How far in advance should I book?
Three to four weeks minimum for standard setups; eight to twelve weeks for large, custom, or peak-season events.
10. What should be in the rental contract?
Exact model and pitch, total square meters and cabinet count, brightness and refresh specs, delivery and build times, labor included, line-item pricing, spare parts on site, technician coverage, insurance, cancellation terms, and payment schedule. If it isn't written down, it isn't guaranteed.
.jpg "What Should You Know Before Choosing LED Video Wall Billboard Manufacturers?")
.jpg "Where to Find Wholesale P1.875 LED Video Wall Manufacturers?")