 English
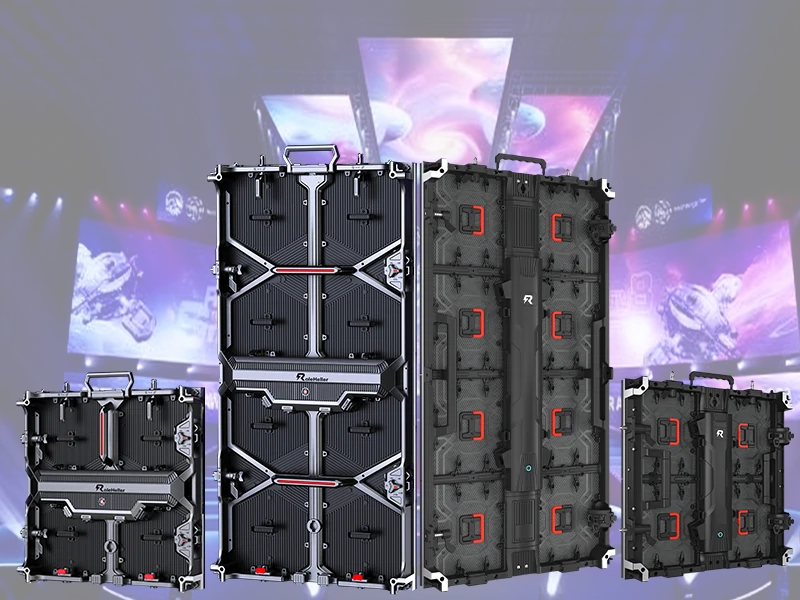
Why do so many hardware engineering leads, embedded systems designers, and contract manufacturing buyers hit expensive roadblocks when dealing with white led display manufacturers? You receive initial golden samples in the mail, plug them into your microcontroller development breadboard, and the pure white digits look crisp, balanced, and sharp against the tinted acrylic bezel. Then your company approves a volume production run of twenty thousand units, you open the shipping crates, and your quality assurance bench discovers that half the numeric tubes display an icy blue tint at 8,000K while the other half display a sickly yellow-white tone at 4,500K. Even worse, within individual digits, Segment A shines noticeably brighter than Segment D because the factory mixed different forward voltage (Vf) semiconductor dies inside the same molded epoxy casing. Sourcing custom white digital displays at scale requires looking past catalog drawings and evaluating phosphor suspension chemistry, lead-frame plating thickness, surface diffusion ink matching, and thermal derating curves.
Let us walk through how precision white LED displays are engineered, what separates medical-grade optoelectronic packaging from disposable toy components, and what technical standards you must demand before signing a volume purchase contract.
What Actually Defines a Precision White LED Display?
When engineers discuss white LED displays in commercial hardware design, confusion happens constantly because suppliers lump three completely distinct display formats under the same broad heading.
| Display Category | Core Physical Architecture | Primary Commercial Applications |
|---|---|---|
| 1. Numeric Seven-Segment & Alphanumeric Tubes | Through-hole or SMD lead-frame; custom light-pipe cavities with phosphor-coated blue InGaN chips. | High-end home kitchen appliances, patient vital sign monitors, EV charging stations, audio mixers. |
| 2. Custom Graphic Dot-Matrix & Bar Graphs | Array of discrete molded white LED dots or bar segments mounted on a multi-layer FR4 epoxy PCB matrix. | Point-of-sale checkout screens, industrial process indicators, factory automation status dials. |
| 3. High-Bright Monochrome Direct-View Screens | Direct-view outdoor P4/P10 SMD or DIP module tiles with white diodes driven by constant-current ICs. | Banking stock rate tickers, transit platform arrival signs, pharmacy cross displays, retail marquees. |
1. Numeric Seven-Segment and 14/16-Segment Alphanumeric Displays
These are the clean, minimalist digital numbers seen on modern smart ovens, laboratory centrifuges, and luxury audio volume dials. Unlike vintage red or amber calculators, pure white numeric displays convey a modern aesthetic. Each segment consists of a tiny reflective light-pipe chamber housing one or two InGaN blue semiconductor chips coated with a phosphor-filled epoxy or silicone diffusion cap.
2. Custom Graphic Dot-Matrix Panels and Bar-Graph Arrays
These displays arrange white emitters in 5x7, 8x8, or custom geometric arrays. They allow embedded devices to render dynamic alphanumeric text, progress bars, and battery gauges without requiring power-hungry LCD or OLED glass. They excel in harsh industrial environments where wide viewing angles and high contrast under daylight are essential.
3. Direct-View Monochrome White Video and Text Modules
These are large-format outdoor or indoor sign boards made up of individual P4, P6, or P10 surface-mount diode tiles. They are deployed in financial trading rooms, bus terminal arrival platforms, and roadside retail signs. They demand ultra-high optical output (typically 5,000 to 7,000 nits) to punch through outdoor sunlight while maintaining clean, legible typography.
The Science of White Light in LED Packaging: The Phosphor Trap
To understand why white displays fail, you have to examine semiconductor physics. There is no such thing as a native white-emitting semiconductor p-n junction. Every white LED in existence is a hybrid converter.
To create white light, the packaging plant mounts a blue InGaN die (typically emitting at a peak wavelength of 450nm to 460nm) onto a copper or silver-plated lead-frame. The technician or automated robot then dispenses a drop of liquid optical resin mixed with microscopic cerium-doped yttrium aluminum garnet (YAG:Ce) phosphor particles over the die.
Some of the blue photons pass straight through the resin without hitting a phosphor particle. Other blue photons collide with phosphor molecules, exciting them to emit a broad spectrum of yellow and red light. When the blue, yellow, and red wavelengths blend together, our eyes register pure white light.
Why Cheap White Displays Look Patchy
Phosphor Settling During Thermal Curing: Phosphor powder is denser than liquid silicone or epoxy carrier resin. If the curing oven heats up too slowly, the heavy phosphor particles sink to the bottom of the cavity around the die before the resin hardens. This leaves the top of the segment starved of phosphor, causing it to emit an icy blue hotspot in the center surrounded by a dingy yellow halo around the edges.
MacAdam Ellipse Mismatch (Chromaticity Spread): Precision optical assemblies must hold color coordinates within a tight 3-step MacAdam ellipse (SDCM < 3) on the CIE 1931 chromaticity diagram. Low-end workshops purchase wide-bin or unbinned blue dies and blend phosphor by hand in plastic cups. The resulting display tubes drift anywhere from 4,000K (warm yellow-white) to 9,500K (harsh blue-white) across the same production batch.
Carrier Resin Yellowing: Low-tier packaging plants use cheap aromatic epoxy resin to seal numeric tubes. Under continuous exposure to blue photons and operating heat, aromatic epoxy molecules degrade and turn yellow over eighteen months. As the resin turns amber, your pure white display transforms into a dim, brownish-green light. High-reliability displays must use cycloaliphatic epoxy or optical-grade methyl silicone that resists photo-thermal degradation.
Technical Specifications: Consumer vs. Medical vs. Automotive Grade
When evaluating quotes from overseas component vendors, you cannot evaluate white LED digital tubes simply by physical outer dimensions. You must scrutinize the internal semiconductor metallurgy, lead-frame plating, and substrate resin.
| Engineering Parameter | Entry-Level Consumer Grade | Commercial & Industrial Grade | Medical & Automotive Grade (AEC-Q102) |
|---|---|---|---|
| Die Metallurgy | Generic Chinese InGaN die (Alloy wire) | Sanan or Epistar InGaN (Copper wire) | Cree, Sanan High-Tier, or Nichia (Gold wire) |
| Bonding Wire Material | 0.8 mil Copper-alloy or Aluminum wire | 1.0 mil Pure Copper wire with Au coat | 1.0 to 1.2 mil 99.99% Pure Gold (Au) wire |
| Color Temperature (CCT) | 6,000K – 9,000K (Wide unbinned drift) | 5,500K – 6,500K (Binning within +/- 300K) | 4,000K, 5,000K, or 6,000K (Tight 3-step SDCM) |
| Luminous Intensity (Iv) | 25 – 45 mcd @ 10mA per segment | 50 – 80 mcd @ 10mA per segment | 90 – 140 mcd @ 10mA (Single-bin matched) |
| Forward Voltage (Vf) | 2.8V – 3.6V (Wide tolerance spread) | 2.9V – 3.3V (Screened to 0.1V groups) | 3.0V – 3.2V (Strict single-voltage binning) |
| Surface Ink Contrast | Raw grey plastic, uneven silk-screen | Matte black painted face, white epoxy | Deep carbon-black matte ink, anti-glare mask |
| Encapsulation Resin | Basic aromatic epoxy (yellows in 1.5 yrs) | Cycloaliphatic clear epoxy resin | High-temperature non-yellowing silicone |
| Operating Temp Range | -20°C to +70°C | -40°C to +85°C | -40°C to +105°C (Full automotive spec) |
Optical Contrast Engineering: Surface Ink and Ambient Light Rejection
A major complaint from product designers using white seven-segment displays is poor contrast under direct overhead lighting.
In a traditional red or green seven-segment display, the segments are unlit, transparent milky-white paths set against a grey background. When a red segment turns on, the vivid red color stands out clearly against the grey face.
With a white display, however, an unlit segment looks milky white because of the resting phosphor paste inside the cavity. If the surrounding plastic faceplate is molded from light grey plastic, an unlit white segment looks almost identical to an illuminated white segment under bright office or outdoor ambient light. Viewers cannot tell whether an "8" is displaying a "0", a "6", or an "8" at a glance.
How Experienced Manufacturers Solve the Contrast Problem
Carbon-Black Face Coating: The factory coats the exterior molded plastic bezel with a non-reflective, deep carbon-black matte ink. This absorbs ambient room reflections and makes the background dark.
Smoked Transflective Face Filters: To hide the milky unlit phosphor segments, the front display window must incorporate a custom-tinted neutral grey acrylic filter (typically 20% to 35% optical transmission). The active white emission punches through the smoked filter easily, while the unlit segments remain completely invisible behind the dark glass.
Segment Cavity Side-Wall Metalizing: In precision packaging, the inner walls of the plastic light-pipe cavities are coated with high-reflectivity titanium dioxide white paint before the die is mounted. This directs every emitted photon forward through the front face, eliminating light leakage (optical crosstalk) between neighboring segments.
Electrical Drive Architectures: Forward Voltage (Vf) and Driver Matching
Designing an electrical circuit for a white LED display is distinctly different from driving standard red displays.
A traditional red LED segment has a low forward voltage of roughly 1.8V to 2.1V. A standard 3.3V or 5V microcontroller input/output pin can easily drive that red segment through a simple current-limiting resistor with plenty of voltage headroom.
A white LED segment, because of its InGaN semiconductor bandgap, requires a forward voltage of 2.9V to 3.4V.
| Circuit Factor | Traditional Red Segment | Modern Pure White Segment |
|---|---|---|
| Forward Voltage (Vf) | 1.9V typical | 3.1V typical (Can swing 2.9V - 3.4V) |
| Headroom on 3.3V Rail | 1.4V available across drop resistor | Only 0.2V available across resistor |
| Current Regulation via Simple Resistors | Excellent; stable across temperature swings and component variations. | Terrible; slight Vf drift causes massive, visible brightness flicker. |
| Recommended Driver IC | Basic 74HC595 shift register with current-limiting resistors. | Constant-current driver (TM1637, MAX7219, HT16K33, or TLC5928). |
The Forward Voltage (Vf) Matching Crisis
What happens when you drive white LED segments using passive resistors on a 3.3V logic rail? Because the forward voltage of white InGaN dies varies between 2.9V and 3.4V across production bins, a segment with a 2.9V forward voltage will draw 15mA of current, shining brightly. The segment right next to it, with a 3.3V forward voltage, will draw only 2mA through that same resistor, appearing dim and lifeless.
To prevent uneven segment brightness:
Demand Single-Bin Forward Voltage Sorting: Require your display manufacturer to group packaged displays into narrow 0.1V forward voltage bins (for instance, Bin V2: 3.0V–3.1V).
Use Active Constant-Current Drivers: Never rely on raw resistors and shift registers to drive white segments. Use dedicated constant-current LED driver ICs (such as the Titan Micro TM1637, Maxim MAX7219, Holtek HT16K33, or Texas Instruments TLC5928). These ICs monitor and regulate output current to each segment independently, delivering identical milliamps regardless of minor variations in forward voltage.
Detailed Step-by-Step Setup and Firmware Driver Calibration Workflow
Let us look below together at the practical operational workflow used by embedded engineering teams to integrate, test, and calibrate a custom multi-digit white LED display onto an ARM Cortex or ESP32 hardware platform.
Phase 1: Pinout Verification & Common Anode / Cathode Test — Probe pins with current-limited 5V DC and 330-ohm resistor to verify polarity.
Phase 2: Hardware Driver Interconnect & Decoupling Setup — Place driver IC within 30mm and add 10uF tantalum plus 0.1uF ceramic decoupling capacitors.
Phase 3: Constant-Current Peak Output Resistor Tuning — Calculate Rext programming resistor for target 12mA drive using 1% metal-film parts.
Phase 4: Time-Multiplexed Scanning Frequency Configuration — Set firmware refresh rate between 400Hz and 1,000Hz to eliminate camera flicker.
Phase 5: Gamma-Corrected Pulse Width Modulation Dimming — Map ambient light levels to logarithmic lookup tables for smooth dimming.
Phase 6: Thermal Soak & Chromaticity Stability Audit — Soak at 40°C under 100% load for 4 hours to confirm under 25°C thermal rise and zero color shift.
Step 1: Pinout Verification and Polarity Identification
Connect your benchtop DC power supply to 5.0V with current limiting set strictly to 10mA.
Take a 330-ohm protective ballast resistor and probe Pin 1 and Pin 8 on the display tube.
Confirm whether the display is Common Anode (CA) (all LED positive terminals tied to a common pin, driven low by sinking current) or Common Cathode (CC) (all negative terminals tied together, driven high by sourcing current). Many embedded driver ICs, like the MAX7219, are hardwired strictly for Common Cathode displays; wiring a Common Anode tube to a CC driver results in complete operational failure.
Step 2: Driver Interconnect and Decoupling Setup
Place your constant-current driver IC (such as the Holtek HT16K33 or Titan Micro TM1637) within 30mm of the display pins on your PCB to minimize high-speed scanning EMI radiation.
Route the row and column driver traces using clean, parallel traces. Avoid routing high-impedance analog sensor traces directly underneath the multiplexed LED bus.
Place a 10uF tantalum capacitor in parallel with a 0.1uF ceramic high-frequency decoupling capacitor directly across the driver IC's VDD and GND pins. Because multiplexing switches current rapidly across multiple segments, inadequate decoupling introduces high-frequency switching ripple into your system's power supply rails.
Step 3: Current-Setting Resistor Tuning
Locate the reference current pin on your driver IC (often labeled
ISETorRSET).Calculate the exact value of the external programming resistor using the manufacturer's reference formula for a target current of 12mA per segment.
Solder a high-precision 1% metal-film resistor into the board. Do not over-drive white InGaN dies past 15mA in multiplexed operation; excessive drive current accelerates phosphor degradation and causes the color temperature to drift toward harsh blue.
Step 4: Configure Multiplexing Refresh Frequency in Firmware
Initialize the driver IC registers over your I2C or SPI bus.
Set the internal display refresh timer. While 60Hz looks solid to the human eye, smartphone camera sensors will capture rolling black bars.
Configure the multiplexing scan rate in firmware to at least 400Hz to 1,000Hz. This ensures smooth, flicker-free performance under smartphone cameras and prevents optical strobing when the user moves their eyes quickly across the display.
Step 5: Implement Logarithmic Pulse Width Modulation Dimming
Because the human eye perceives brightness logarithmically rather than linearly, a 50% reduction in LED drive current looks like only a 15% reduction in perceived brightness to the human brain.
Build a 16-step or 32-step gamma-corrected lookup table in your firmware microcontroller flash memory.
Map your ambient light sensor readings into this gamma-corrected table to smoothly step down the display brightness in darkened rooms. This stops pure white digits from causing uncomfortable glare in bedroom environments while keeping numbers legible in midday sun.
Step 6: Thermal Soak and Color Stability Audit
Place the assembled board into a temperature-controlled chamber set to 40°C.
Turn on 100% of the display segments (displaying "8.8.8.8") at full brightness for four hours continuously.
Measure the surface temperature of the center digits using a thermal camera. If the center digit rises more than 25°C above ambient, increase the copper pour area on your PCB ground plane to dissipate heat away from the cathode and anode pins. Check for color shifts across the display: if segments turn noticeably bluer as they heat up, the phosphor concentration is too thin to handle the thermal load.
Realistic Pricing Benchmarks and Production Minimums (FOB China)
To help your procurement team evaluate quotes and spot offers that cut corners on internal components, use these realistic baseline costs for precision white LED displays:
| Display Model & Dimensions | Packaging Architecture | Color Temp (CCT) & Grade | Target Luminous Intensity | Est. FOB China / Unit (USD) | Standard Factory MOQ |
|---|---|---|---|---|---|
| 0.36-inch 4-Digit 7-Segment | Through-hole DIP, black face | 6,000K Commercial Grade | 50 – 70 mcd @ 10mA | $0.28 – $0.42 | 2,000 – 5,000 pcs |
| 0.56-inch 4-Digit 7-Segment | Through-hole DIP, black face | 5,000K or 6,000K Pure White | 60 – 90 mcd @ 10mA | $0.38 – $0.58 | 2,000 – 5,000 pcs |
| 0.80-inch Single Digit | Heavy industrial DIP housing | 6,500K High-Bright | 80 – 120 mcd @ 10mA | $0.22 – $0.35 | 1,000 – 3,000 pcs |
| 0.54-inch 14-Segment Dual | Alphanumeric (Letters + Numbers) | 5,500K Clean White | 50 – 80 mcd @ 10mA | $0.75 – $1.15 | 2,000 pcs |
| Custom Appliance Icon Panel | Molded light-pipe + custom mask | Multi-icon + 7-segment array | 70 – 110 mcd (Uniform) | $1.40 – $2.60 | 5,000 pcs (+$1.8k tooling) |
| Custom White Bar-Graph Array | 10-Segment linear bar-graph | 4,000K Warm or 6,000K Cool | 40 – 60 mcd per bar | $0.45 – $0.70 | 3,000 pcs |
(Note: Pricing reflects volume production runs. Custom plastic mold tooling, silk-screen masks, expedited air freight, and local import tariffs are extra.)
Sourcing Traps: How Packaging Workshops Cut Corners
When searching for white LED display manufacturers, you will find hundreds of trading companies displaying identical stock photos. Here is how low-tier packaging operations cut costs—and why those shortcuts lead to field failures:
| Component / Process | Budget Workshop Short-Cut | Certified Optoelectronic Standard |
|---|---|---|
| Bonding Wire Material | Thin copper or aluminum-alloy wire; breaks under thermal fatigue cycles. | 99.99% pure gold (Au) wire; resists oxidation & thermal shock. |
| Lead-Frame Plating | Thin flash silver plating (0.5um); tarnishes to brown lead in air. | Heavy silver plating (2.0um - 3um) over oxygen-free copper substrate. |
| Phosphor Dispensing Precision | Manual pneumatic syringe needle; massive volume & CCT variance. | Automated 3-axis automated valve with vacuum de-airing centrifuge. |
| Optical Sorting Method | Visual inspection by worker eye; mixed bins packed in same tube. | 100% automated spectrometer sort; strict MacAdam ellipse grouping. |
| Thermal Curing Process | Rapid high-temp bake in basic oven; causes severe phosphor settling. | Multi-zone ramped temperature profile curing prevents sinking. |
The Tarnish Hazard: Thin Silver-Plated Lead-Frames
Inside every molded display, the metal pins are stamped from an iron-copper alloy plated with silver to provide electrical conductivity and optical reflectivity.
Low-cost workshops cut plating time, depositing a microscopic silver layer under 0.5 microns thick.
When components are shipped over ocean freight or stored in humid warehouses, atmospheric sulfur penetrates the permeable epoxy casing. The thin silver layer tarnishes into black silver sulfide (Ag2S).
This tarnishing reduces internal cavity reflectivity by over 40%, cutting the display's brightness in half before the customer even powers the device on.
What I frequently use on projects: Always specify a minimum silver plating thickness of 2.0 to 3.0 microns over high-conductivity oxygen-free copper, verified by X-ray fluorescence (XRF) plating thickness testing.
What happens when an overseas vendor claims they have automated sorting, but parts drift in the field?
Many brokers claim that every batch undergoes 100% optical spectrometry. What they actually do is test five sample units from a 50,000-piece production run, leaving the rest unsorted.
When you install these unsorted units on a production line, you get random chromaticity drift across your products. Always mandate a signed Optical Inspection Data Sheet with your lot shipping papers, showing the exact percentage distribution of CCT bins, forward voltage groupings, and luminous intensity spread.
Critical Procurement Questions to Ask Overseas Manufacturers
When vetting sales engineers via video conference or email, asking specific technical questions quickly separates genuine cleanroom packaging plants from commercial trading firms.
"Can you provide the chromaticity binning coordinates on the CIE 1931 chart for this exact part number?"
A trading intermediary will usually stall, send a generic brochure showing general color ranges, or claim that "all white LEDs are pure white." A genuine optoelectronic packaging foundry will immediately provide an official Binning & Labeling Specification Sheet showing their standard chromaticity codes (for example, Bin W1: x=0.28, y=0.29; Bin W2: x=0.29, y=0.30). They will allow you to lock in a specific, single chromaticity bin in your purchase agreement so your production lots match year after year.
"What is your phosphor dispensing viscosity and de-airing procedure?"
Ask the manufacturer how they prevent phosphor settling and air bubbles during dispensing:
Reliable packaging operations mix their phosphor powder into optical silicone using a planetary vacuum centrifugal mixer to pull every micro-bubble out of the slurry.
They store mixed resin in temperature-controlled dispensers equipped with continuous mechanical agitation to prevent phosphor particles from settling to the bottom of the syringe barrel during eight-hour shifts.
If a factory cannot explain how they keep phosphor suspended in their dispensing syringes, their color consistency will vary wildly across production batches.
What if custom non-standard graphic icons and numeric combinations are required?
If your device requires a unique display layout—such as two digital numbers paired with custom battery icons, Wi-Fi symbols, and temperature scales—ordering off-the-shelf catalog tubes will not work. You need to develop a custom tooling mold.
In optoelectronic packaging hubs, custom plastic tooling for a molded display bezel and light-pipe cavity is surprisingly affordable. A dedicated mold typically costs between $1,500 and $3,000 USD for precision injection steel, with a tooling lead time of roughly three to four weeks.
The factory cuts a custom light-pipe reflector, prints a bespoke silk-screen mask with your custom icons, and routes an internal sub-PCB to match your microcontroller pinout. Once tooled, unit prices for custom icon displays drop down to standard catalog levels, giving your product a distinctive interface without inflating your bill of materials.
Four-Gate Factory Quality Audit Protocol (Pre-Shipment)
Never wire a final balance payment based solely on a short video clip sent over a chat app. Require concrete quality milestones built directly into your formal purchase agreement:
| Milestone Gate | Mandatory Verification Action |
|---|---|
| 1. Wafer & Wire Audit | Confirm wafer foundry certs (Sanan/Epistar); inspect SEM image verifying genuine gold-wire ball bonding; measure silver plating thickness via XRF. |
| 2. Automated Optical Sorting (AOI) | Audit spectrometer test data; verify that 100% of units fall within the agreed CIE 1931 chromaticity bin and single forward-voltage window. |
| 3. High-Temp Burn-In & Thermal Cycling | Execute 168-hour continuous burn-in at 85°C / 85% relative humidity; verify that luminous degradation measures strictly under 3%. |
| 4. Solderability & Hermetic Seal Audit | Subject lead pins to 260°C wave soldering simulation; inspect for epoxy delamination, pin looseness, or light-pipe bleeding. |
Structure your purchase agreement around these verification gates:
30% Advance Deposit: To initiate custom lead-frame stamping, PCB fabrication, and cleanroom SMT setup.
70% Final Balance: Released only after an independent testing lab or third-party quality inspector audits the finished batch, reviews the spectrometer sorting histograms, and signs off on the inspection report.
Real-World Case Breakdown: Sourcing 40,000 Medical Infusion Pump Displays
A medical device manufacturer based in Germany recently upgraded their hospital infusion pump line, replacing an old blue backlit LCD screen with a custom high-contrast dual-digit white LED display to improve legibility for nursing staff across dark hospital rooms.
| Project Aspect | Engineering Specification Details |
|---|---|
| Production Volume | 40,000 custom multi-digit display panels manufactured in Dongguan |
| Optical Specification | Pure White 5,000K; tight 3-step MacAdam ellipse; 80 mcd @ 10mA per segment |
| Electrical Topology | Common Cathode configuration; matched forward voltage bin (3.05V – 3.15V) |
| Contrast Architecture | Deep carbon-black matte faceplate; anti-reflective smoked PMMA front window |
| Silicon Architecture | Sanan high-reliability InGaN dies; 1.0 mil pure gold wire ball bonding |
| Certification Needs | ISO 13485 medical manufacturing compliance; RoHS & REACH certified |
What Went Right:
Contractual CIE Chromaticity Window: The engineering team locked down an exact chromaticity window on the CIE 1931 coordinate map (x = 0.34 +/- 0.01, y = 0.35 +/- 0.01). Any tube falling outside this window was rejected during automated sorting. As a result, when fifty infusion pumps sit on a hospital charging rack, every display exhibits an identical color temperature.
Anti-Reflective Optical Filter Integration: The engineers specified a smoked neutral-density front acrylic window with an anti-glare matte coating. This completely concealed the unlit phosphor segments, making the white digits stand out with high contrast under bright operating theater lights.
Active Constant-Current Driver Implementation: The hardware team used Holtek HT16K33 driver ICs, ensuring that segment brightness remained rock-steady even as the pump's backup battery discharged from 4.2V down to 3.4V.
The Costly Mistake:
The procurement team originally chose standard commercial packaging without specifying moisture barrier packaging (MBP). The components were shipped in standard cardboard boxes over a four-week ocean container route during monsoon season. Ambient humidity penetrated the unsealed lead-frames, and during wave soldering at the German assembly plant, trapped moisture expanded, causing micro-cracks in the epoxy of nearly 800 display tubes. The company had to scrap those boards and implement mandatory 24-hour baking cycles before assembly. The issue was resolved by requiring future shipments to use vacuum-sealed moisture barrier bags with fresh desiccant packs and humidity indicator cards.
Practical Recommendations from Field Hardware Engineering
After years of troubleshooting optoelectronic components on production lines, one clear lesson stands out: treating white LED displays as generic commodity hardware is the fastest way to derail a product launch.
When you install a display on a consumer device, medical monitor, or industrial controller, that screen is the primary interface between your engineering work and the human user. If the digits look sickly yellow, if adjacent numbers shine with uneven brightness, or if segments fade after six months of use, customers will judge your entire product as low-quality.
My personal advice is to lock down your chromaticity binning, forward voltage tolerances, and lead-frame plating directly in your manufacturing agreement. Partner with established packaging foundries that operate automated optical sorting cleanrooms, insist on pure gold wire bonding, and verify that your electrical design uses active constant-current driver ICs rather than passive resistors. Taking the time to audit these optoelectronic details early protects your product's reliability and ensures your display performs cleanly for years to come.
Frequently Asked Questions
1. What is the standard minimum order quantity (MOQ) for white led display manufacturers?
For standard catalog seven-segment white numeric displays (such as common 0.36-inch or 0.56-inch 4-digit modules), most established Chinese packaging factories set an MOQ between 1,000 and 3,000 pieces. For fully custom displays requiring bespoke plastic cavity tooling, unique icon silk-screening, or non-standard pinouts, factories typically require an MOQ of 5,000 to 10,000 pieces to absorb setup costs, accompanied by a one-time tooling fee between $1,500 and $3,000 USD.
2. Why are white LED displays more expensive than traditional red or green displays?
White displays cost roughly 25% to 40% more than red displays due to materials and yield rates. Red LEDs use mature AlGaInP semiconductor wafers that emit native red light with near-100% optical yield. White LEDs require expensive InGaN blue semiconductor dies, precision rare-earth phosphor slurry compounds, automated micro-dispensing stages, and optical spectrometer binning steps to filter out units with color temperature drift.
3. What causes "ghost segments" to faintly glow on multi-digit white displays?
Ghosting occurs when multiplexed scan lines leak residual current into unaddressed segments. Because white InGaN diodes have high luminous efficiency at micro-amp currents, tiny parasitic capacitance discharges or reverse recovery delays in driver transistors can cause unlit segments to glow faintly in dark rooms. You can resolve ghosting by adding pull-down or pull-up bleeder resistors (typically 10k ohms) across driver lines or enabling hardware blanking intervals in your driver IC firmware.
4. What is the typical operating lifespan of a white numeric LED display?
A properly engineered white LED display operating at 10mA to 12mA per segment has an operating lifespan (L70 metric) of roughly 50,000 hours (over five years of continuous operation) before luminous intensity drops to 70% of its original output. However, if segments are driven at high currents (20mA+) in hot operating environments (60°C+), thermal degradation of the phosphor slurry and epoxy can drop the lifespan to under 15,000 hours while causing the color to shift toward a dim blue.
5. How do I prevent yellow-ring halo artifacts around white display digits?
Yellow-ring artifacts occur when phosphor particles settle unevenly in the liquid resin before thermal curing, creating a blue-dominated center and a yellow-dominated edge. To eliminate halos, specify packaging houses that use vacuum centrifugal planetary mixing, automated dispensing robots with temperature-controlled syringe agitation, and multi-stage ramped thermal curing profiles that lock the phosphor suspension in place before settling can occur.
6. What forward voltage range should I design for when building power supplies for white displays?
Always design your power supply rail and constant-current drivers around a forward voltage range of 2.9V to 3.4V DC per segment. For battery-powered products running on a single lithium cell (3.0V to 4.2V), you cannot drive white segments directly from the battery rail without risking uneven brightness as the battery drops. Use a small boost regulator or a dedicated charge-pump LED driver to maintain a steady 5.0V bus for consistent optical output.
7. What is the difference between cool white, neutral white, and warm white in numeric displays?
Cool white displays have a correlated color temperature (CCT) between 6,000K and 8,000K, producing a crisp, modern blue-white tone commonly used in clean medical and tech gear. Neutral white sits between 4,500K and 5,500K, providing a balanced, paper-white appearance ideal for precision lab equipment. Warm white sits between 3,000K and 4,000K, delivering a soft, yellowish-white tone preferred for luxury kitchen appliances and vintage-styled audio products.
8. Can white seven-segment displays be read easily in direct outdoor sunlight?
Yes, but standard consumer displays (emitting 40 to 60 mcd) will look washed out in open daylight. For direct sunlight readability, you must specify ultra-bright white dies capable of producing at least 120 to 180 mcd per segment at 15mA, paired with a deep carbon-black matte faceplate and an external anti-reflective, polarizing front window filter to absorb surface daylight reflections.
9. What spare parts ratio should I purchase for a custom white display production run?
For custom molded display panels, always order an extra 3% to 5% spare units from the exact same manufacturing wafer and phosphor production lot. Because forward voltage and chromaticity bins drift between production runs, sourcing matching displays months later is difficult. Keeping spare units from the original lot ensures that repair units will visually match production hardware.
10. Does a CE or RoHS certificate from an overseas supplier ensure medical or automotive compliance?
No. CE and RoHS certify basic environmental and electrical safety in the European Union, but they do not prove compliance with high-reliability standards. For medical devices, your manufacturer must operate an ISO 13485 certified optoelectronic facility with documented lot traceability. For automotive applications, the display assembly must pass AEC-Q102 stress testing, which includes rigorous thermal shock cycling, vibration stress, and high-temperature operating life (HTOL) verification. Always verify the manufacturer's official audit certificates before finalizing a volume contract.
.jpg "Which China LED Video Wall Rental Display Manufacturers Actually Deliver Quality and Speed?")
.jpg "Where to Find Wholesale P2 LED Video Wall Manufacturers That Actually Deliver?")