English
Looking to bypass the brutal 300% markup of retail sign companies and build your own commercial-grade video wall or programmable storefront display? You can source directly from modular DIY LED sign display manufacturers in manufacturing hubs like Shenzhen (specifically the Bao'an and Guangming districts) or through their direct factory sales outlets. Sourcing bare LED modules, receiving cards, and switching power supplies straight from the factory floor cuts total hardware costs by 40% to 65% compared to purchasing pre-cased retail units.
The secret that sign shops don't advertise is straightforward: almost nobody builds an LED sign from scratch down to the silicon. Modern LED display manufacturing is completely modular. Factories produce standard magnetic modules, driver ICs, receiving cards, and 5V switching power supplies. Your job as a DIY builder isn't soldering thousands of tiny surface-mount diodes by hand; it's sourcing reliable, bin-matched factory components and assembling them into a custom frame that fits your exact space.
A common misunderstanding is that DIY LED sign manufacturing means etching your own circuit boards. Unless you are an electrical engineering student working on a miniature desktop breadboard, building a commercial sign that way is an exercise in frustration.
When you contact DIY LED sign display manufacturers, you are tapping into the component supply chain. You buy the exact same building blocks used by commercial digital billboard integrators:
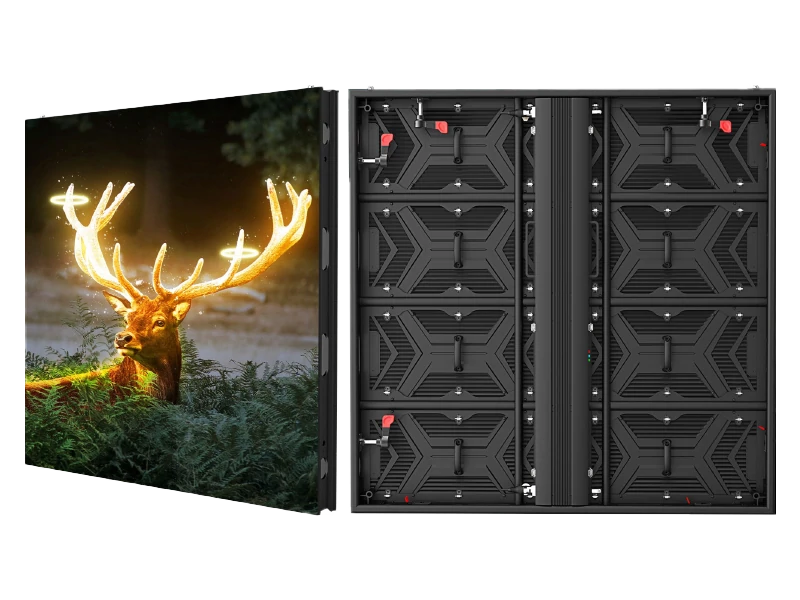
LED Display Modules (Panels): Self-contained PCB boards featuring LED lamp beads on the front, driver ICs on the back, and standard magnetic mounting standoffs.
Controller Hardware: Sending cards, asynchronous media players, and receiving cards that handle pixel mapping and signal transmission over Gigabit Ethernet.
Power Units: Ultra-slim 5V switching power supplies engineered to handle the dynamic electrical loads of active video.
Structural Hardware: Extruded aluminum frames, die-cast rental cabinets, or custom laser-cut sheet metal with waterproof silicone gaskets for outdoor installs.
Instead of paying $6,000 to a turnkey retail brand for an outdoor message board, sourcing those exact parts from component factories often runs between $1,800 and $2,400. That leaves you with superior hardware, complete control over your spare parts inventory, and no proprietary software locks.
Factory sales reps talk in acronyms and part numbers. If you message an OEM rep asking for "a bright screen for my shop window," they immediately recognize you as a retail customer and price you accordingly. To get true factory pricing and compatible parts, you have to talk specs from the start.
The module is the visual face of your screen. You need to make three clear decisions:
Pixel Pitch (P-Rating): The millimeter distance between diode centers. A P2.5 panel has 2.5mm spacing between pixels; a P10 has 10mm spacing. As a practical rule of thumb, minimum viewing distance in meters roughly equals the pixel pitch number (P4 is crisp from 4 meters away; P10 looks pixelated up close but provides massive punch outdoors at 30+ feet).
Diode Encapsulation: Standard SMD (Surface Mounted Device) is the industry workhorse. For indoor areas within reach of hands or accidental bumps, ask for GOB (Glue on Board), which lays down an optically clear epoxy resin over the diodes for impact and moisture resistance. High-end micro-pitch projects (P0.9–P1.5) use COB (Chip on Board).
Brightness Rating: Indoor displays require 600 to 1,000 nits (cd/m²). Anything brighter indoors will cause eyestrain. Outdoor setups competing with direct afternoon sunlight demand a minimum of 5,000 to 6,500 nits.
Most factories build around one of three dominant controller ecosystems:
NovaStar: The global industry standard. NovaLCT configuration software is thoroughly documented, and community troubleshooting is readily available online. If you want peace of mind, insist on NovaStar (such as MRV208 or MRV328 receiving cards, paired with a TB30/TB50 multimedia player).
Colorlight: Highly reliable, exceptionally competitive pricing on high-refresh-rate receiving cards (e.g., i5+ series), and widely supported across mid-tier rental companies.
Huidu (HD): Popular for single-color, dual-color, and budget text/graphics asynchronous signs. If you only need a scrolling text board or simple graphic loop without live HDMI input, Huidu cards configured via HDPlayer save money and configure easily.
LED modules run on low-voltage direct current—almost universally 5V DC.
Never cut corners here. High-refresh LEDs create rapid, heavy current spikes when a screen shifts from black to full white.
Mean Well (specifically the ultra-thin HSP and UHP series) represents the gold standard for clean power, high heat dissipation, and low failure rates.
Reliable Chinese OEM alternatives like Chuanglian or RVT offer solid performance on budget builds, provided you run them at no more than 75% of their rated amperage load.
Modules connect to receiving cards via flat 16-pin ribbon cables using the standard HUB75 or HUB75E interface.
Check that your manufacturer includes high-spec, pure-copper ribbon cables with secure latching clips. Cheap, copper-clad aluminum cables introduce data crosstalk, which manifests as random flickering lines across your display.
Modules secure to structural frames via magnetic screws anchored into steel studs or custom aluminum profiles. Outdoor builds require sealed cabinet enclosures (IP65 rated) with rear drainage channels, forced-air exhaust fans, and waterproof aviation-style connectors for both AC mains and signal lines.
To keep expectations grounded when reviewing quotes, here is what actual modular components run on average when sourcing directly from Tier-2 and Tier-3 Chinese manufacturers:
| Component Type | Common Industry Spec | Average Factory Unit Price (USD) | Critical Quality Metric | Sourcing Recommendation |
|---|---|---|---|---|
| Indoor Module | P2.5 SMD2121 (320×160mm) | $11.00 – $16.50 / panel | Nationstar or Kinglight wire bond | GOB coating recommended if reachable |
| Outdoor Module | P4 SMD1921 (320×160mm) | $13.50 – $19.00 / panel | IP65 front silicone seal, >5500 nits | Insist on copper-bracket LEDs |
| Receiving Card | NovaStar MRV208 / MRV328 | $14.00 – $22.00 / card | Genuine NovaStar firmware support | 1 card per 256×256 to 512×512 pixels |
| Media Player / Sender | NovaStar Taurus TB30 / TB50 | $110.00 – $175.00 / unit | Wi-Fi/4G cloud, HDMI loop | Crucial for standalone DIY installs |
| Power Supply | 5V 40A / 200W Ultra-Slim | $9.00 – $18.00 / unit | Mean Well UHP-200 or Chuanglian A-200 | Allocate max 35A per 40A unit |
| Die-Cast Cabinet | 640×640mm Aluminum Frame | $45.00 – $70.00 / frame | CNC precision machining tolerances | Ideal for clean modular DIY framing |
Over 85% of the world’s LED screen components originate from a tight industrial cluster in Guangdong Province, China. Understanding who you are dealing with on platforms like Made-in-China, Alibaba, or direct manufacturer portals saves endless headaches.
                      [Global LED Supply Chain]
                                 │
     ┌───────────────────────────┴───────────────────────────┐
     ▼                                                       ▼
[Tier-1 Giants]                                    [Tier-2 Specialized OEMs]
(Unilumin, Leyard, Absen)                         (Bao'an / Shiyan / Guangming)
  • Billion-dollar revenue                          • Highly accessible MOQs (1–10 pcs)
  • Focus on stadium/turnkey contracts              • Sells raw modules, cards & parts
  • Rigid sales channels; no DIY kits               • Custom magnetic frames on request
                                                             │
                                                             ▼
                                                    [Component Specialists]
                                                    • NovaStar / Colorlight (Controllers)
                                                    • Mean Well / Chuanglian (Power)
                                                    • Nationstar / Kinglight (Lamps)
Tier-1 Giants (Unilumin, Leyard, Absen, Qiangli Jucai): While Qiangli Jucai makes millions of standard wholesale modules, these companies focus primarily on massive turnkey enterprise deployments or wholesale domestic distribution networks. They rarely accommodate a foreign DIY builder who needs twenty modules and custom configuration files.
Tier-2 Specialized OEM/ODM Factories (Bao'an & Shiyan Clusters): This is the sweet spot for the DIY builder. These mid-sized factories source branded lamp beads (Nationstar, Kinglight) and driver ICs (Chipone, Macroblock), assemble the PCB modules on high-speed SMT lines, and maintain dedicated overseas sales teams. They are willing to sell small orders (even 10–30 modules), supply custom spare parts, pre-flash your receiving cards with the correct .rcfgx calibration files, and ship via DHL or air freight.
Trading Companies (Middlemen): Many entities advertising online do not own factory floors; they purchase overstock components and re-box them. You can usually spot them because their representatives struggle to provide deep technical answers about refresh rate formulas, PWM driver chips, or custom receiving card wiring topologies.
The most common trap for buyers sourcing DIY LED sign display components is buying discounted modules that turn out to be B-stock or factory clearance bins. Here is how you protect yourself:
Ask the manufacturer point-blank: "Are these Nationstar, Kinglight, or Sanan lamp beads, and are they gold-wire or copper-wire bonded?"
Gold-wire bonding offers maximum resistance against oxidation, making it the premier choice for outdoor environments with high humidity.
Copper-wire bonding is standard for indoor applications and high-value commercial installs, balancing cost and reliability.
Steer clear of unbranded white-label diodes. They degrade at uneven rates, causing ugly color-patching across the display after just a few months of operation.
A cheap display module uses basic driver ICs delivering a refresh rate of only 960Hz to 1920Hz. To human eyes, this looks fine in person, but if someone photographs or films your sign with a smartphone, dark rolling scan lines will show up across the image.
Request driver ICs (like Chipone ICN2153 or Macroblock MBI5153) capable of ≥3,840Hz high refresh rates. This ensures smooth video playback and clear camera capture.
LED diodes are manufactured in discrete manufacturing batches ("bins") with microscopic variations in color temperature and lumen output.
Always order 10% to 15% extra spare modules from the exact same production lot.
If a panel fails two years down the line and you order a replacement from a new batch, that single panel will stand out like an off-color sore thumb against the rest of your screen, even after calibration.
Wiring an LED display is straightforward once you grasp the division between low-voltage DC power and Gigabit Ethernet signal routing.
[110V/220V AC Mains] ──> [Breaker / Distribution] ──> [5V DC Power Supply] ──> [Red/Black Harness] ──> [LED Modules]
                                                                                                            │
[Media Player / PC]  ──> [Gigabit Ethernet Cable] ──> [Receiving Card]     ──> [16-Pin HUB75 Cable] ────────┘
Never guess your power requirements. Every module has a maximum wattage rating (full white at peak brightness) and an average operational wattage (typical text/video mix).
Formula to size your DC power supplies: Total Amps = (Module Count × Peak Watts per Module) / 5V
Suppose you are building an indoor P3 display using 18 modules (each module measuring 320×160mm). Each module consumes approximately 25W peak at 5V.
Peak Power: 18 × 25W = 450W total.
Current Draw: 450W / 5V = 90 Amps.
Safety Factor: Always run switching power supplies at a 75% load margin to minimize heat generation and prolong component life (90A / 0.75 = 120A required capacity).
Power Supply Selection: Three standard 5V 40A (200W) power supplies wired in parallel will comfortably handle this display without stressing internal capacitors.
Ethernet to Receiving Card: Run standard Cat5e or Cat6 twisted-pair cabling from your NovaStar/Colorlight sender to the first receiving card's primary RJ45 port.
Cascade Loop: If your display uses multiple receiving cards across a large cabinet array, daisy-chain from the "Out" port of Card 1 to the "In" port of Card 2.
HUB75 Flat Ribbon Routing: From each receiving card port, run a 16-pin ribbon cable to the first module in a column or row, then cascade to the next module via the data out/data in headers on the rear PCBs. Keep ribbon cable lengths under 70cm to avoid signal attenuation and image ghosting.
Let's look at real numbers for a typical small business project: a 6.3ft × 3.15ft (1920mm × 960mm) Outdoor P5 LED Message Board with cloud control and high-brightness output.
| Sourcing Route | Hardware Included | Shipping & Tariffs | Total Investment | Warranty & Support Reality |
|---|---|---|---|---|
| US/EU Local Retailer (Turnkey) | Finished cabinet, internal wiring, cloud software subscription | Included in domestic freight | $5,800 – $7,500 | 2-3 Year limited warranty, but repairs require expensive field tech visits. |
| Turnkey Drop-Shipper | Pre-assembled budget screen, generic controller | $600 air/sea freight | $3,400 – $4,200 | Generic components; difficult to source exact matching replacement parts later. |
| Factory-Direct DIY Component Build | 18× P5 outdoor modules (Kinglight), 1× NovaStar TB30, 2× MRV208 cards, 3× Mean Well 5V 40A PSUs, custom extruded frame | $350 DDP air freight (components only) | $1,650 – $2,150 | You own spare matching modules; you can repair any component within 10 minutes. |
The DIY route saves roughly 60% of the upfront project cost while delivering a critical operational advantage: service independence. When an LED module takes an impact or a power supply fails three years later, you don't have to wait three weeks for an expensive sign technician. You simply pop off the magnetic module, swap the quick-connect power spade, plug in your spare, and the sign is fully back in service.
Follow this disciplined workflow during assembly to avoid blowing sensitive driver chips on your first power-up.
[Bench Test Modules] ──> [Frame Fabrication] ──> [Mount Hardware] ──> [DC Power Wiring] ──> [Config & Mapping]
        │                         │                     │                     │                     │
 Test every module        Ensure surface is      Install PSUs and      Check polarity with   Load factory .rcfgx
  with test card           flat within 1mm        cards to frame        DMM before plug-in      file via NovaLCT
Before mounting a single screw into your custom frame, set up a testing table. Plug each module individually into a test controller or receiving card. Run through full-field red, green, blue, and solid white screens using the test button on your sending system. Check for dead diodes, cold solder joints, or color tint drift. Finding a bad panel before it's hung 15 feet in the air saves hours of disassembly.
The most visible flaw in a home-built LED wall is "seam unevenness." If your backing frame is twisted by even 1.5mm, shadow lines will appear between modules when viewed from an angle.
Use extruded aluminum T-slot framing (like 2020 or 4040 aluminum extrusions).
Place the frame face down on a flat workbench and verify diagonal squareness using a precision square and dial caliper before tightening your corner bracket gussets.
Reversing polarity on high-amperage 5V lines destroys LED driver ICs in milliseconds.
Use standard color-coded silicon wire: Red for +5V VCC, Black for Ground (GND).
Before connecting the quick-release power harnesses to your LED modules, fire up the power supplies and verify each lead with a digital multimeter. You should see a clean +5.0V to +5.15V reading across every positive and ground terminal.
When you order modules from a quality manufacturer, request the exact Receiving Card Configuration File (for NovaStar, this is a .rcfgx file; for Colorlight, a .rcg file).
Connect your PC to the sending device via USB or Ethernet.
Open NovaLCT, navigate to the Screen Configuration screen, enter the password (admin), click Receiving Card, and hit Load from File.
Upload the file provided by your rep. This instantly configures the scanning frequency, row-decoder pins, refresh rates, and blanking settings for that specific module's driver IC.
Map your screen resolution by setting the column and row module count, click Send to Hardware, and then hit Save to RV Card. Your custom DIY sign will immediately light up with crystal-clear output.
Even on professionally planned builds, initial power-ups often present minor issues. Here is how to track down the usual culprits:
Symptom: A single module displays scrambled horizontal lines while adjacent panels show clean video.
Fix: 95% of the time, this points to a loose or damaged 16-pin HUB75 ribbon cable. Power down, reseat both ends firmly, or swap in a new ribbon cable. If the issue remains, inspect the rear pins on the module's input header for bent prongs.
Symptom: The entire screen displays a faint greenish or reddish tint during dark scenes.
Fix: Your white balance calibration needs adjustment. In your controller software, open the color temperature balance menu and manually adjust the low-end RGB gain curves, or check that your 5V power rails aren't sagging below 4.7V under dynamic video load.
Symptom: Pixels flicker rapidly when high-brightness white text flashes on screen.
Fix: Classic voltage drop. The wire gauge feeding that row's power harness is too thin, or the power supply is hitting its over-current protection ceiling. Run an additional 5V DC feeder tap directly from the power supply to the far end of the module chain.
Taking the DIY route with LED sign manufacturing isn't about cutting corners on quality; it's about spending your budget on superior components rather than retail sales overhead. When you source directly from specialized component manufacturers in the Bao'an and Guangming districts, you gain direct access to the same commercial hardware driving arena scoreboards and high-end digital billboards worldwide.
Start small. Order a compact 3×2 module development kit along with a NovaStar controller and power supply. Build it on your workbench, get comfortable with the NovaLCT mapping environment, master the HUB75 routing, and inspect the solder work firsthand. Once you understand how these modular systems fit together, you will never pay inflated retail sign prices again.
Have you tackled a custom LED panel build or run into quirks with specific controller software? Drop your thoughts, questions, or current build specs in the comments below.
Yes. Most Tier-2 and Tier-3 manufacturers operate active B2B export divisions that handle cross-border transactions via international wire transfer, credit card, or payment protection platforms. They regularly sell evaluation sets, replacement parts, and small modular orders directly to individual makers, engineering teams, and small business owners.
For standard indoor and outdoor modules (such as P2.5, P3, P4, and P5), most modular factories maintain an MOQ between 1 and 10 panels. Because modules are batch-produced in large runs, ordering small samples for DIY projects is widely accepted. However, controller cards and power units are almost always sold individually with zero MOQ.
For live video and commercial displays, NovaStar is the most user-friendly thanks to comprehensive English documentation, active user forums, and widespread tutorial support. For simple scrolling text, store opening hours, and lightweight promotional graphics that update over Wi-Fi, Huidu with the HDPlayer mobile app offers a gentler learning curve.
Outdoor weather resistance requires an IP65 rating on the front face and IP54 or better on the rear enclosure. Use outdoor modules manufactured with thick silicone front-mask gaskets. Mount them to an aluminum cabinet frame equipped with rubber sealing strips, waterproof cable glands for your electrical drops, and louvered ventilation hoods fitted with fine dust filters.
No. Almost all commercial LED display modules run exclusively on regulated 5V DC. Feeding 12V or 24V directly into standard HUB75 modules will immediately destroy the surface-mount driver ICs and LED lamp beads. If you are running your system off a 12V or 24V battery bank (such as a vehicle or solar setup), install a dedicated high-amperage DC-to-DC buck converter to step the voltage down to a stable 5V.
Always order 10% to 15% extra LED modules from the exact same production batch to protect against future diode failures or accidental impacts. In addition, request two extra HUB75 ribbon cables, two 5V power wiring harnesses, a spare receiving card, and an extra magnetic mounting bolt pack.
A synchronous controller mirrors an active video input in real time from an external source (like a PC, media player, or game console via HDMI). An asynchronous controller features onboard flash storage and an integrated processor; you upload video loops, schedules, or graphics over Wi-Fi, 4G, or USB, and the sign runs independently without remaining tethered to a host computer.
Quality LED display modules utilizing gold-wire or premium copper-wire diodes carry an engineering lifespan rating of 80,000 to 100,000 hours under normal operating conditions. In real-world terms, running a screen 14 hours a day at 60% calibrated brightness translates to 10 to 15 years of practical service before diode brightness degrades significantly.
When you finalize your module order, request the specific configuration file directly from your factory account manager. Factory engineers retain the exact software profile tuned to your module's driver IC, decode chip, and refresh profile. Keep a backup copy of this file stored in the cloud alongside your project notes.
Most modular LED manufacturers ship small DIY parcels using international air express carriers (DHL, FedEx, UPS). For larger orders, you can request DDP (Delivered Duty Paid) freight terms. Under DDP, the manufacturer’s shipping agent handles export clearances, ocean or air freight, customs brokerage, and local duties, delivering the crates directly to your workshop door without surprise paperwork.
.jpg "Who makes P3.91 LED walls in China?")